HostGator is one of the most popular web hosting providers. Check out the easy way of Installing WordPress on HostGator using QuickInstall technique.
Installing WordPress on HostGator
Many people believe that creating a site is very difficult, they assume that they need to understand some coding language to build sites. The fact is you don’t even require to write a single line of code to create a WordPress site.
WordPress is one of the best open-source CMS (Content Management System) platforms, if you are a newbie or experienced, you can certainly start with WordPress because it’s free and relatively easy to use.
Once you buy hosting from HostGator, you will receive an email with cPanel Login credentials and instructions.
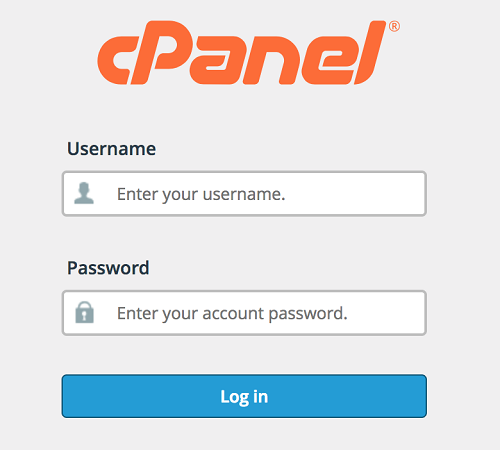
Log in to your cPanel. The login URL link will be like; http://YourDomainName.com/cpanel. you can find it in the email that HostGator sent.
If you want to use a blog in this field, WordPress will then be installed in your website's sub-directory e.g. http://YourDomainName.com/blog. But you can leave this field blank if you want to install WordPress in the Root directory itself.
You will now be asked to enter your WordPress site details. You will need to provide the site name, administrator username, first and last name, and administrator email address. Make sure you have access to this email address because this is where you will receive your WordPress password reset email.
Now Click Install! Your WordPress will be installed within a couple of minutes. That’s it, your WordPress Installation is complete. Upon completion, you will see an installation successful message.
After your WordPress installation is finished, you will receive an email about the Login path and ID, Password.
You will now be able to log in to your WordPress account using the login credentials that you received in the email. The login URL will be; http://YourDomainName.com/wp-admin.
WordPress is one of the best open-source CMS (Content Management System) platforms, if you are a newbie or experienced, you can certainly start with WordPress because it’s free and relatively easy to use.
What is a cPanel?
A cPanel is the central area where users access their account information and manage their content. So today I am going to show you how to Install WordPress on HostGator Web Hosting.
How to Install WordPress on HostGator using QuickInstall
Although there are different ways to install WordPress on HostGator Hosting. In today's tutorial, I will cover the QuickInstall method because it is easy and barely takes 10 minutes to Install WordPress.Once you buy hosting from HostGator, you will receive an email with cPanel Login credentials and instructions.
Log in to your cPanel. The login URL link will be like; http://YourDomainName.com/cpanel. you can find it in the email that HostGator sent.
Once you’re logged in, scroll down and you will see the Software/Services section. Click on the QuickInstall icon. You can see this in my below image.
Now click on WordPress
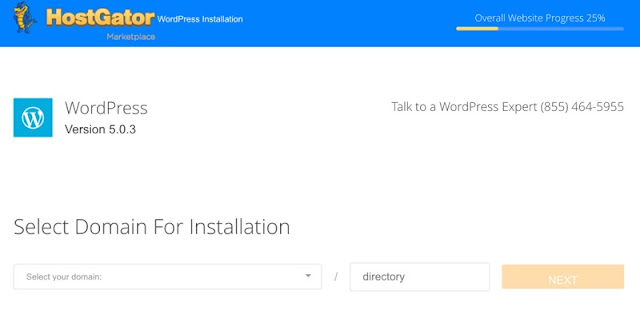
You will now be prompted to select the domain name you wish to install WordPress on and enter a directory path. Most people who are beginners want to install WordPress at the root of their domain name. In this case, you are supposed to leave the directory field blank.
Now click on WordPress
You will now be prompted to select the domain name you wish to install WordPress on and enter a directory path. Most people who are beginners want to install WordPress at the root of their domain name. In this case, you are supposed to leave the directory field blank.
You will now be asked to enter your WordPress site details. You will need to provide the site name, administrator username, first and last name, and administrator email address. Make sure you have access to this email address because this is where you will receive your WordPress password reset email.
Now Click Install! Your WordPress will be installed within a couple of minutes. That’s it, your WordPress Installation is complete. Upon completion, you will see an installation successful message.
After your WordPress installation is finished, you will receive an email about the Login path and ID, Password.
You will now be able to log in to your WordPress account using the login credentials that you received in the email. The login URL will be; http://YourDomainName.com/wp-admin.
Conclusion
While installing WordPress may seem daunting, the truth is that anyone can create a blog on their own and your new site should be up and running in minutes.
Once WordPress is installed, the fun can begin and you can start fine-tuning your site. Good luck!
- [message]
- Note
- You may observe that your WordPress site not being accessible if you’ve just happened to change your Name servers or DNS records, in this case, do not worry as it might take some hours to propagate.
So did you find this tutorial helpful? Do share your thoughts or queries in the comments section below.


COMMENTS